Accurate marking and measurement is very essential in carpentry work, to produce parts to exact
size. To transfer dimensions onto the work; the following are the marking and measuring tools
that are required in a carpentry shop.
Steel Rule and Steel Tape
Steel rule is a simple measuring instrument consisting of a long, thin metal strip with a marked
scale of unit divisions. It is an important tool for linear measurement. Steel tape is used for large
measurements, such as marking on boards and checking the overall dimensions of the work.

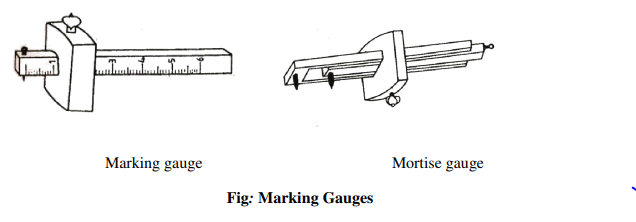
Marking Gauge
It is a tool used to mark lines parallel to the edge of a wooden piece. It consists of a square wooden stem with a sliding wooden stock (head) on it. On the stem is fitted a marking pin, made of steel. The stock is set at any desired distance from the marking point and fixed in position by a screw. It must be ensured that the marking pin projects through the stem, about 3 mm and the end are sharp enough to make a very fine line. A mortise gauge consists of two pins. In this, it is possible to adjust the distance between the pins, to draw two parallel lines on the stock.
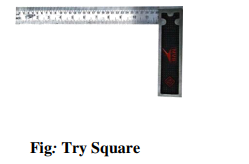
Try ‐ Square
It is used for marking and testing the squareness and straightness of planed surfaces. It consists of a steel blade, fitted in a cast iron stock. It is also used for checking the planed surfaces for flatness. Its size varies from 150 to 300 mm, according to the length of the blade. It is less accurate when compared to the try‐square used in the fitting shop.
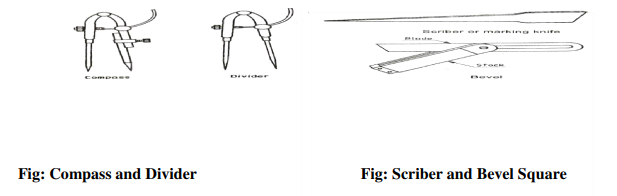
Compass and Divider
Compass and divider are used for marking arcs and circles on the planed surfaces of the wood.
Scriber or Marking Knife
It is used for marking on timber. It is made of steel having one end pointed and the other end
formed into a sharp cutting edge.
Bevel Square
It is used for laying‐out and checking angles. The blade of the bevel is adjustable and may be held in place by a thumb screw. After it is set to the desired angle, it can be used in much the same way as a try‐square. A good way to set it to the required angle is to mark the angle on a surface and then adjust the blade to fit the angle


Comments are closed.