For drawing projections of solids, one has to frequently draw projections of lines either parallel to the HP or the VP and inclined to the other with an angle that is between 0 to 90°.Similarly, sometimes, the projections of plane surfaces Perpendicular to one and inclined to the other are required to be drawn.
Importance Points Of Projection Of Lines

Further, it may be recollected that the relations of the original point, line, or plane with the HP are the relations of its FV or SV with the XY line. Similarly, those with the VP are the relations of its TV with the XY line or it’s SV with the X IY1 line.
IMPORTANCE POINTS OF PROJECTION OF PLANES:

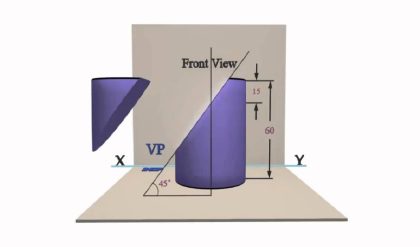
Projections Of Solids With The Axis Parallel To One And Inclined To The Other Reference Plane:
The projections of a solid with its axis parallel to the VP and inclined to the HP or parallel to the HP and inclined to the VP cannot be drawn directly as the base of such a solid will not be parallel to anyone of the reference planes and two steps are required to draw the projections. Such problems are solved in two steps and the possible cases are listed in a table.
Hints For Conditions To Be Satisfied In Two-Step Problems

Hint For Position Of The Axis

PROJECTIONS OF SOLIDS WITH THE AXIS INCLINED TO BOTH THE HP AND THE VP (HINTS FOR CONDITIONS TO BE SATISFIED IN THE THREE-STEP PROBLEMS):


Comments are closed.