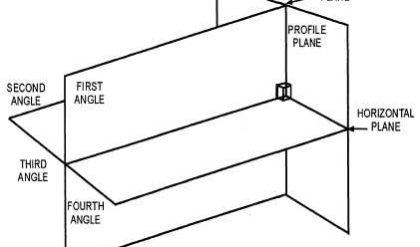
A point is simply a space location of infinitesimal size. It may represent the corner of an object, the intersection of two lines or a designated spot in space. The projection obtained on vertical plane VP is called the elevation and on horizontal plane HP, the plan. The intersection line of the vertical plane and the horizontal plane is known as ground line or reference line.
Position of points:
(i) In front of the VP and above the HP
(ii) In front of the VP and in the HP
(iii) In the VP and above the HP
(iv) Behind the VP and above the HP
(v) Behind the VP and in the HP
(vi) Behind the VP and below the HP
(vii) In the VP and below the HP
(viii) In front of the VP and below the HP
(ix) In the VP and HP
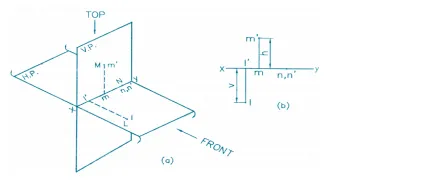
GENERAL PROCEDURE TO DRAW PROJECTION OF POINTS
1. From given data identify the quadrant
2. Draw the XY line and projection
3. Along this projector mark by dots the distances of the given point form the HP and VP, on the corresponding side of the XY line, depending upon the quadrant in which the point lies, to locate the front view and the top view, respectively.
4. Make the front view and the top view bold and rub off the unwanted length of the projector to complete the solution.

Comments are closed.